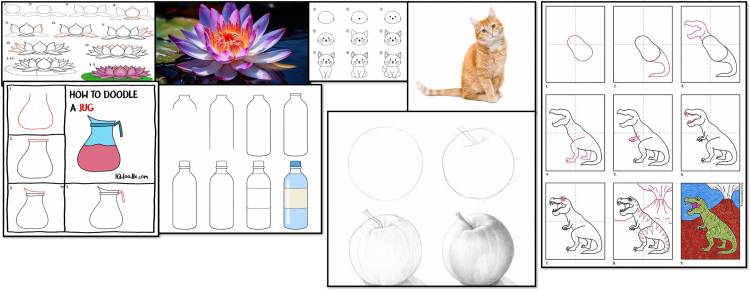
How to draw Lotus, cat, pitcher, Apple, bottle and Dinosaur.
How to draw Lotus, cat, pitcher, Apple, bottle and Dinosaur.
Table of Contents
How to Draw a Pitcher with Colour: 2
How to Draw a Cup Perch (Perched Cup): 3
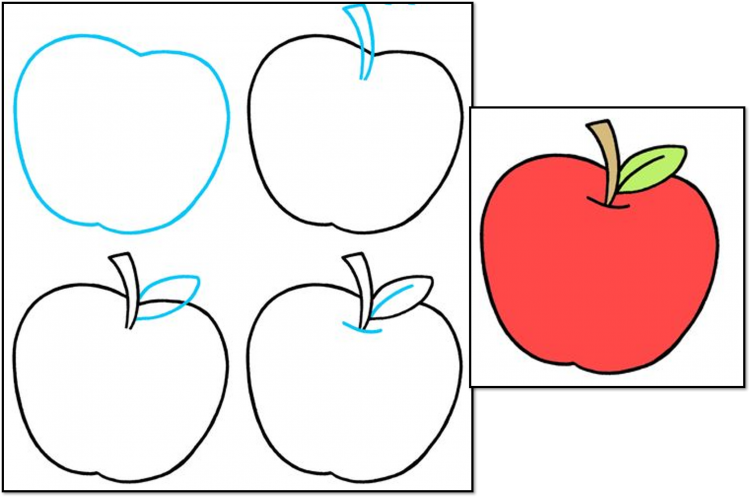
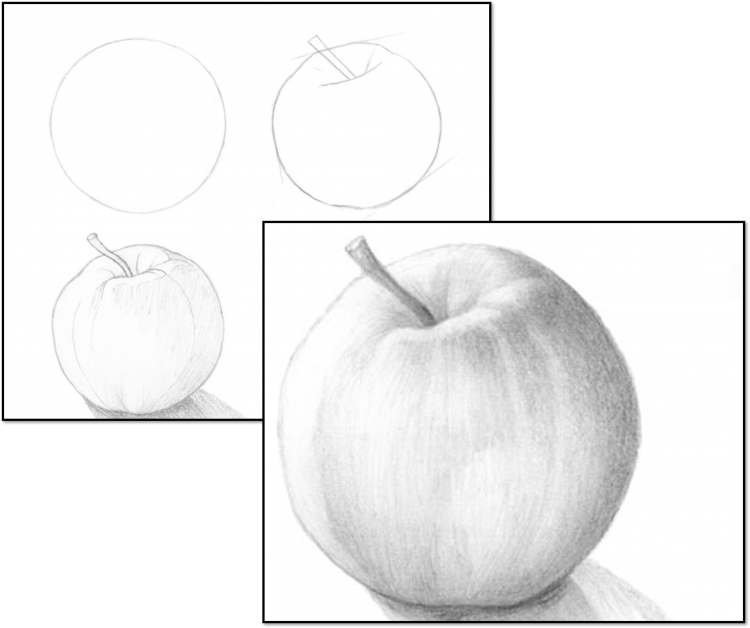
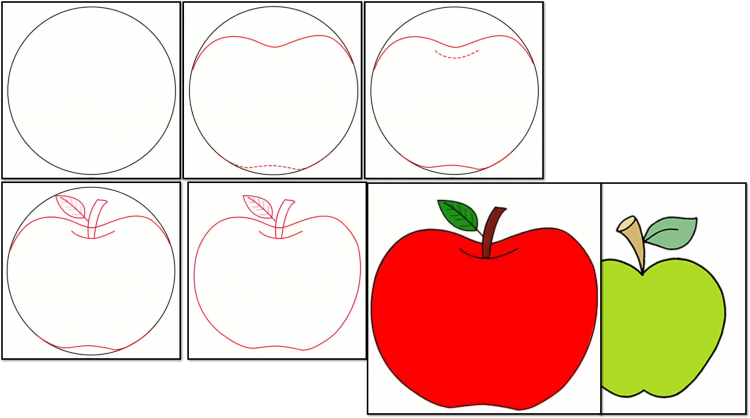
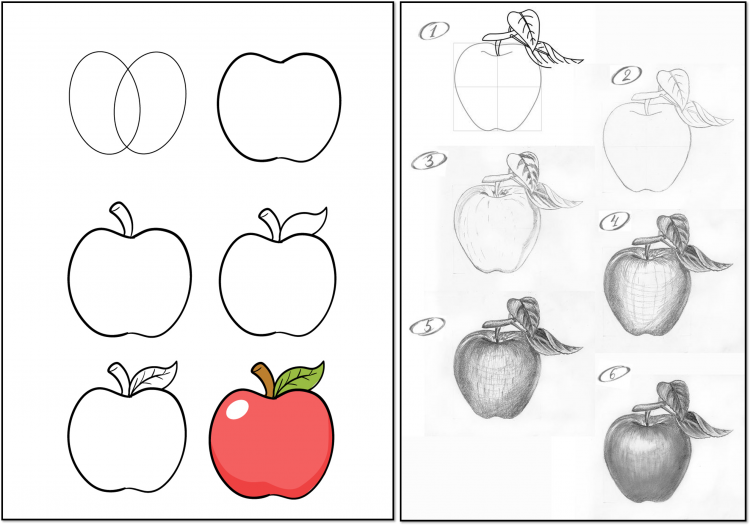
How to Draw a Bottle with an Apple: 3
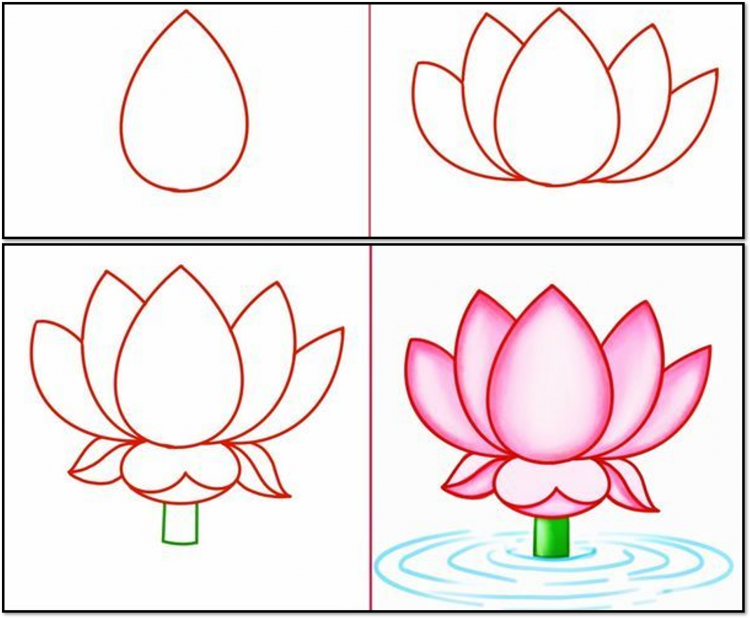
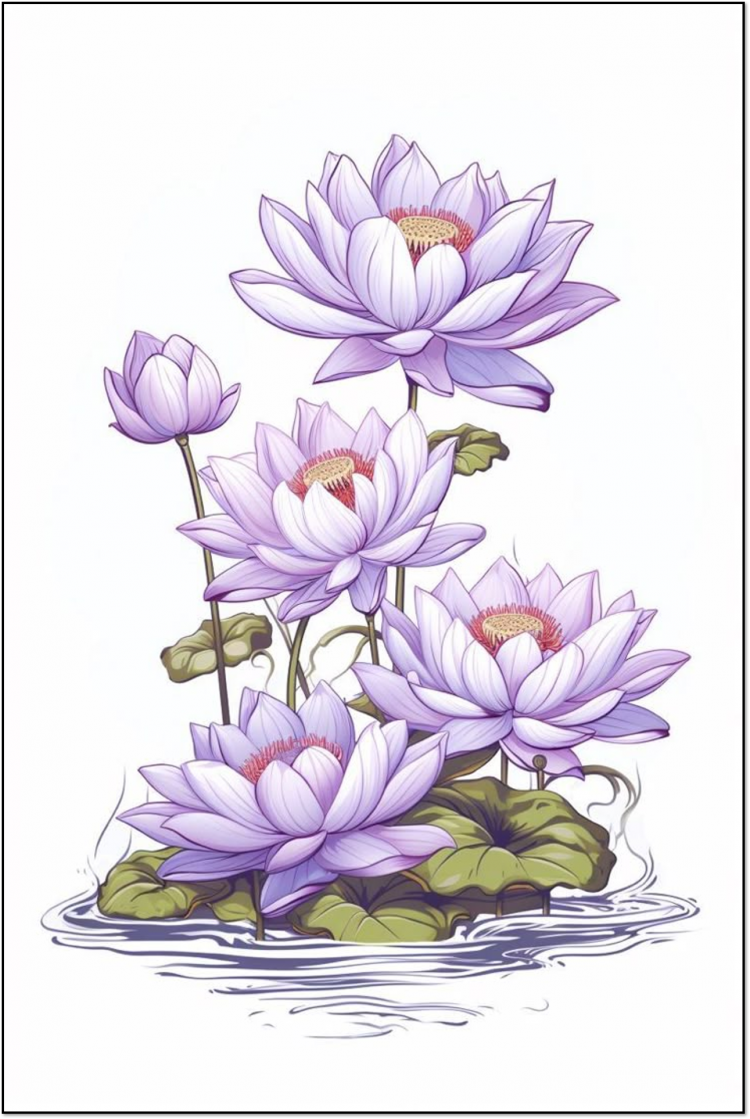
How to Draw a Lotus:
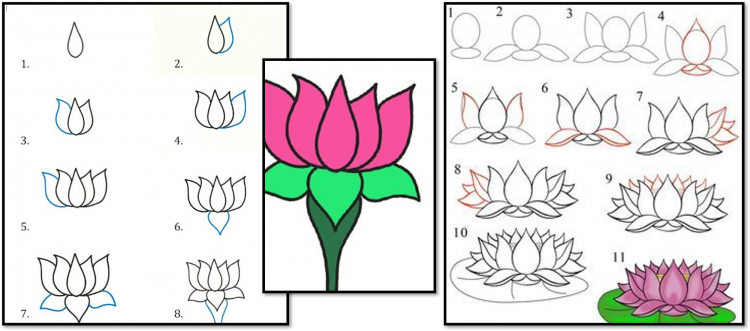
- Start with the Centre: Draw a small oval or circle at the centre for the flower's core.
- Sketch the Petals: Draw several elongated oval shapes or teardrop-like petals radiating from the centre. Arrange them in layers around the centre.
- Refine the Petals: Add details to each petal, making them slightly pointed at the tips and curved at the base.
- Add the Leaves: Draw large, round, or oval-shaped leaves beneath the flower, slightly curving to indicate their shape.
- Detail the Flower: Add texture to the petals with subtle lines to show the folds and veins.
- Shading: Shade the petals lightly, focusing on the inner areas and leaving the edges lighter to create depth.
- Finishing Touches: Add finer details such as veins in the leaves and final touches to the petals to enhance the drawing's realism.
Other Methods
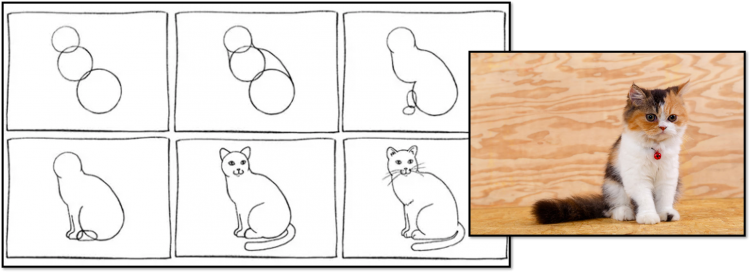
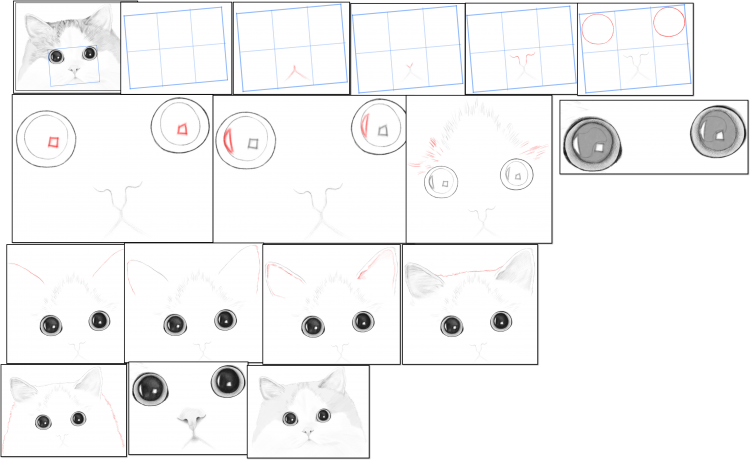
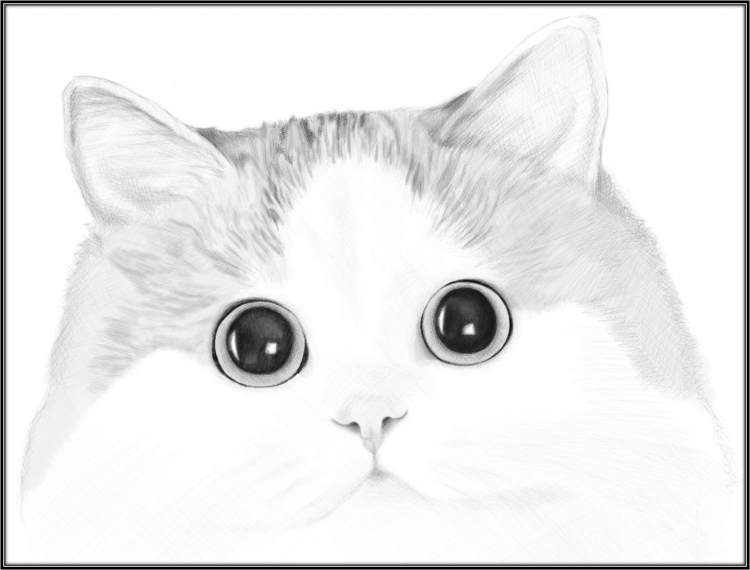
How to Draw a Cat Face:
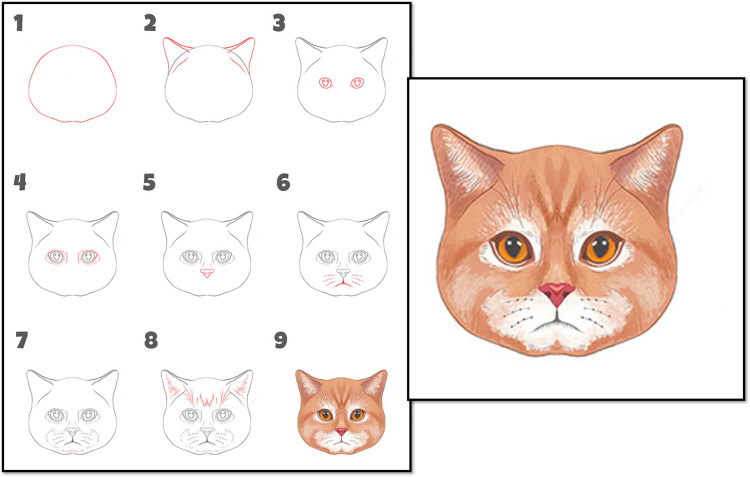
- Start with a Circle: Draw a simple circle for the cat's head.
- Add Guidelines: Draw a vertical line down the center and a horizontal line across the middle of the circle. This helps place the facial features symmetrically.
- Draw the Ears: On each side of the circle, draw two triangular shapes for the cat's ears, slightly slanted outward.
- Outline the Face Shape: Refine the circle by adding a slight curve at the bottom to form the cat's chin and cheeks.
- Draw the Eyes: Draw two large almond-shaped eyes along the horizontal guideline. Add pupils in the centre of each eye.
- Add the Nose: Below the eyes, draw a small triangle with rounded corners for the nose.
- Mouth and Whiskers: From the bottom of the nose, draw two curved lines that extend downward and outward for the mouth. Add three short lines on each side for the whiskers.
- Details in the Ears: Inside each ear, add smaller triangular shapes to represent the inner ear.
- Final Touches: Add shading or details to the eyes, nose, and fur to give the face depth and texture.
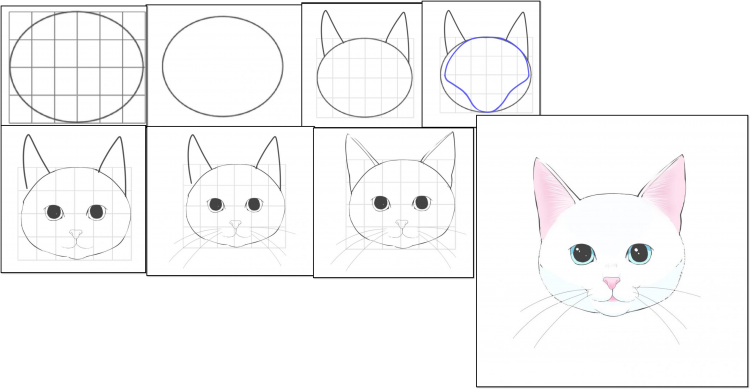
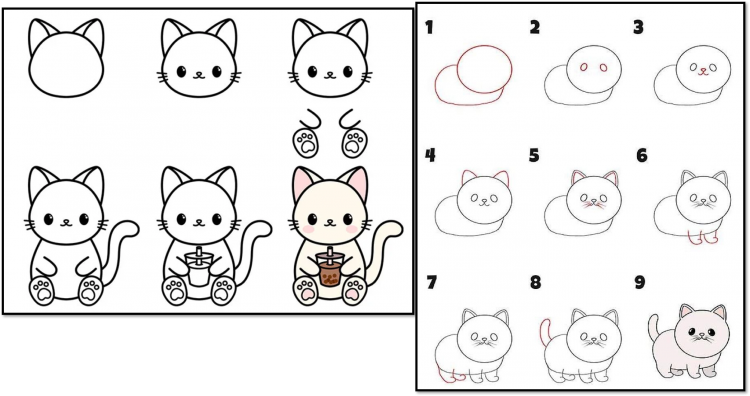
Other methods
How to Draw a Pitcher with Colour:
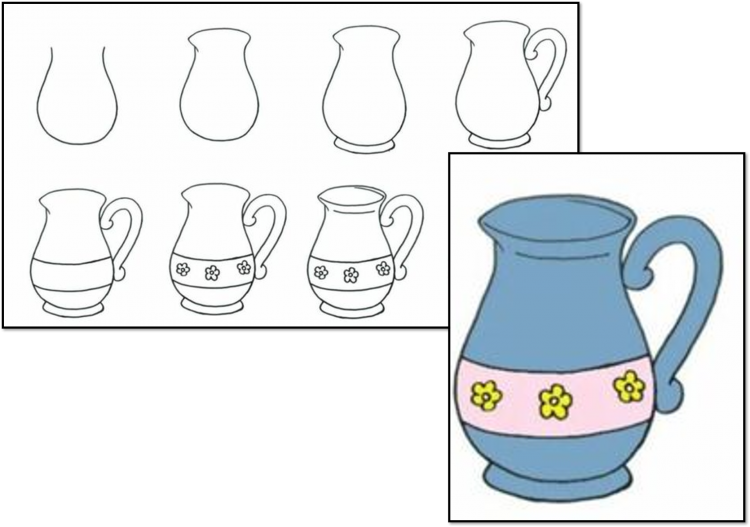
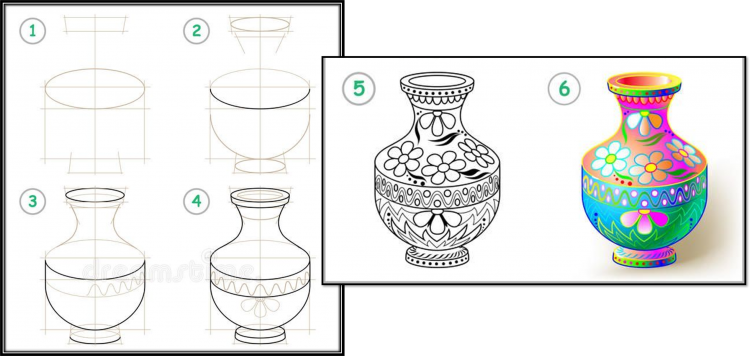
- Sketch the Outline:
- Start by drawing the basic shape of the pitcher. Use a vertical oval for the top opening, then draw two curved lines extending downward to form the body of the pitcher.
- Add a slightly curved line at the bottom for the base.
- Draw a handle on the side of the pitcher, curving it in a smooth, C-shape, and a spout at the top, tapering gently.
- Refine the Shape:
- Smooth out the lines to define the form of the pitcher, adjusting the curves where necessary.
- Add details to the spout and handle for realism, showing where the handle connects to the body.
- Add Details:
- If the pitcher is a decorative one, add any patterns or texture, such as horizontal lines, dots, or floral designs.
- Draw a small line around the top to create the lip of the pitcher.
- Shading and Depth:
- Lightly shade the pitcher, considering the light source. Add shadows on one side to create depth and dimension.
- Add more shading around the handle and the bottom to emphasize the three-dimensional shape.
- Add Color:
- Base Color: Fill the body of the pitcher with a light base color (e.g., light cream, terracotta, or any color you prefer for the pitcher).
- Shading: Use a darker shade of the base color to add depth in the shaded areas (e.g., darker brown or beige for shadow).
- Handle and Spout: Color the handle and spout with a complementary shade, like a darker or metallic tone if it’s made of metal.
- Decorative Elements: If the pitcher has designs, carefully fill in those areas with contrasting colors (e.g., bright floral designs or simple stripes).
- Finishing Touches:
- Blend the colors and use a lighter color for highlights to show reflections of light on the pitcher’s surface.
- Add texture to the pitcher (if it’s made of clay, ceramic, etc.) using a fine-tipped pencil or lighter strokes to create the effect of a textured surface.
other methods
How to Draw a Cup Perch (Perched Cup):
- Draw the Cup's Base: Start by drawing the basic shape of the cup — a simple oval or ellipse for the top and a straight line downward for the sides.
- Draw the Cup’s Body: Extend the lines down from the top, slightly curving them outward to form the cup's body, and close off the bottom with a curved line to form the base.
- Add the Handle: On the side of the cup, draw a curved handle. It can be shaped like a half-heart or a loop.
- Position the Perch: To create a "perch," draw a simple, horizontal line or stick under the cup, extending outward. This can represent a wooden surface or branch the cup is resting on.
- Add Shadows or Texture: For depth, you can add shading to the cup, handle, and perch. Draw light shadows underneath the cup and along the edges to give it a more three-dimensional look.
- Final Touches: Add any additional details like decorative patterns on the cup, texture on the perch, or small objects around the cup to make the scene more interesting.
Other mthods
How to Draw a Bottle with an Apple:
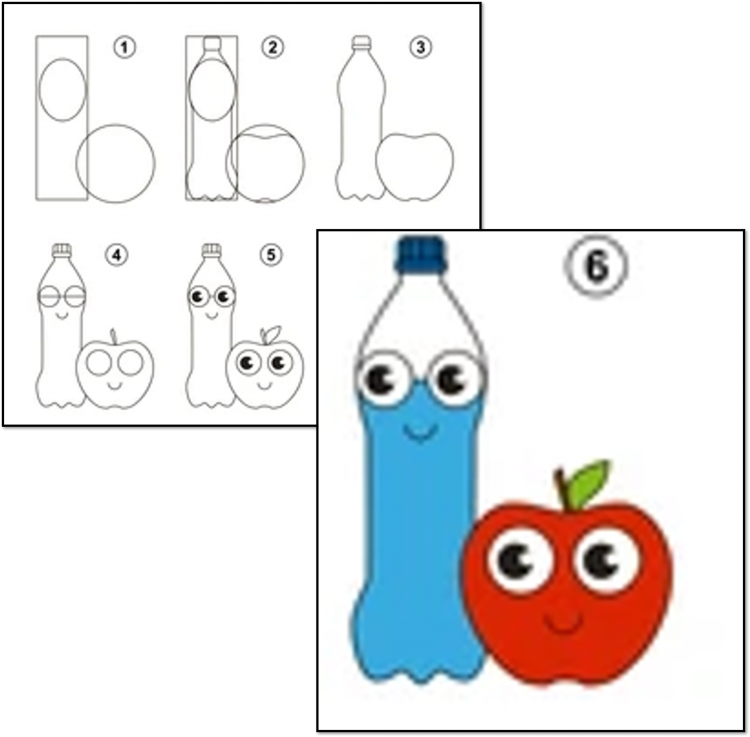
1. Start with the Bottle
- Outline the Bottle: Draw a tall, narrow rectangle with slightly curved sides for the bottle's body.
- Add the Neck: At the top, draw a smaller vertical rectangle or cylinder for the neck of the bottle.
- Draw the Cap: On top of the neck, draw a small circle or oval shape for the bottle's cap or cork.
2. Draw the Apple
- Outline the Apple: Draw a circle or slightly oval shape next to the bottle, slightly tilted if you want to give it a more natural look.
- Add the Stem: At the top of the apple, draw a short curved line for the stem.
- Add the Leaf: Draw a small oval or teardrop shape next to the stem for the leaf.
3. Add Details to the Bottle
- Shading: Add vertical lines or slight curvature inside the bottle to suggest its reflective glass surface.
- Label or Design: If you want to make the bottle more interesting, draw a label on the front, which could be a simple rectangle or oval.
4. Add Details to the Apple
- Texture: Add some light shading or small curves on the apple to give it dimension and show its roundness.
- Details: Add a slight shadow under the apple and bottle to ground them.
5. Final Touches
- Shading: Shade the bottle lightly to give it a glass-like reflective appearance.
- Detailing the Apple: Add slight shading or highlights to the apple to give it a glossy, fresh look.
other methods
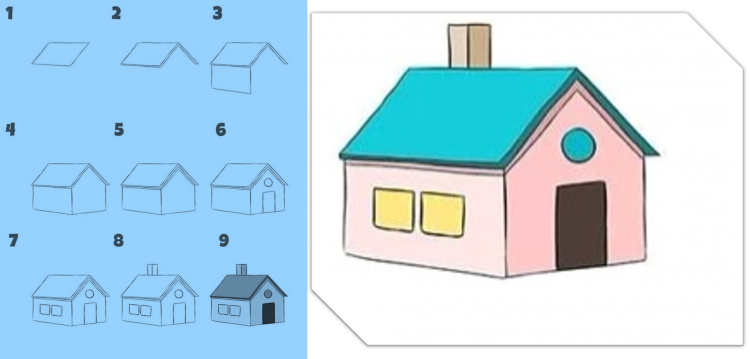
How to Draw a Hut:
- Draw the Base: Start with a rectangular shape for the bottom of the hut. This will be the main body.
- Add the Roof: On top of the rectangle, draw a triangular shape for the roof. Make sure the triangle is centered and slightly slanted.
- Detail the Roof: Add lines or patterns on the roof to give it texture, like straw or thatch, to make it look more realistic.
- Draw the Door: In the center of the rectangular body, draw a vertical rectangle for the door. Add a small rectangle at the top for a window or doorframe.
- Add Windows: Draw square or rectangular windows on the sides of the hut. You can draw a small window in the roof as well, if desired.
- Add the Chimney: Draw a small rectangular shape coming out of the roof for a chimney. You can add a wavy line on top to represent smoke.
- Draw the Foundation: Add a few lines along the base of the hut to show the ground or foundation it sits on.
- Detail the Walls: You can add horizontal or vertical lines on the sides of the hut to create the texture of wooden planks or thatched walls.
- Final Touches: Add a few surrounding elements like a path, trees, or grass to make the hut feel more alive. Add shading and details for depth.
other more

How to Draw a Dinosaur:
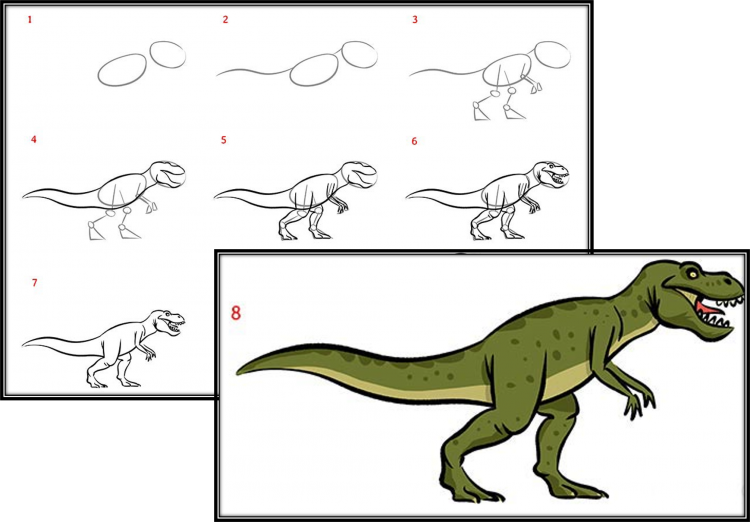
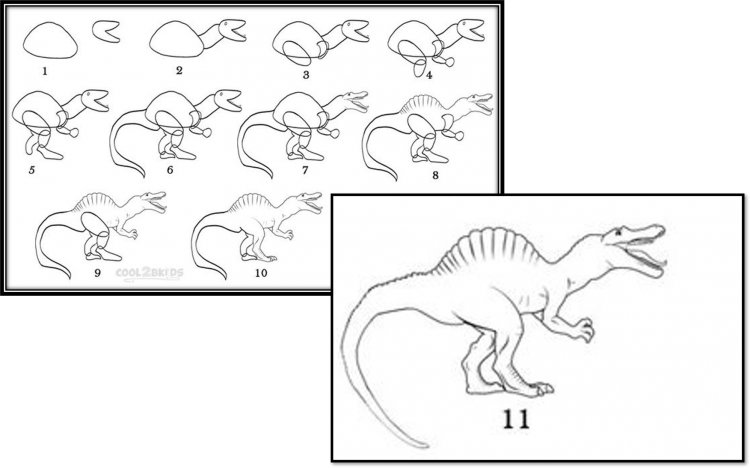
- Start with the Body:
Draw an elongated oval or a rounded shape for the dinosaur's body. This will be the main structure. - Add the Head:
Draw a smaller oval shape for the head. Connect it to the body with a curved line for the neck. - Draw the Tail:
Extend a long, curved line from the back of the body to create the tail. Depending on the dinosaur, the tail can be straight or have a slight curve. - Add the Limbs:
- Front legs: Draw two thick, short legs coming from the front of the body. Make sure they look like sturdy columns, as dinosaurs had powerful limbs.
- Hind legs: Draw longer, stronger back legs. These should have more definition in the thighs, with three toes at the end of each leg for some dinosaurs (like theropods).
- Draw the Neck and Details of the Head:
- Add facial details, like eyes, nostrils, and mouth.
- Depending on the type of dinosaur, you can draw spikes, a frill, or horns on the head.
- Add the Tail Details:
Add lines or scales on the tail to give it texture, or make it spiky depending on the type of dinosaur. - Detail the Body:
Add some texture to the body with simple lines for skin folds or scales. For certain dinosaurs, like stegosaurus, add plates or spikes along the back. - Draw the Feet:
Add details to the feet, such as claws or toes, to make them more realistic. - Add Background or Ground (Optional):
Draw rocks, trees, or a prehistoric landscape to place your dinosaur in its natural habitat. - Final Touches:
Add shading and any final details like spots, scales, or other texture details to make your dinosaur drawing more dynamic.
This step-by-step guide will help you draw a all charming sketches !